4.75 out of 5
4.75
39 reviews on Udemy

Audio Production Level 2 – Compressors

Learn to Use Compression in a Confident and Informed Way to Improve Your Audio Production on either PC or Mac
Instructor:
Liam Davin, sound-tutor.com
414 students enrolled
English [Auto]
Ratio - how to work out what ratio to use
Attack & Release - why they are needed and how best to use them
Learn the power of Side Chain Compression and its potential pitfalls
Learn to understand the difference between RMS Compression and Peak Compression
An in-depth look at Parallel Compression
Master Bus Compression - what to listen for and how to use it effectively
An introduction to Transient Processers & Dynamic EQ

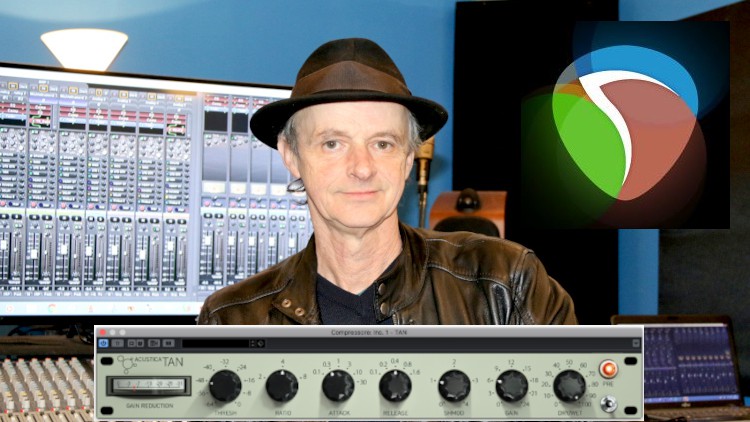
This course:  Audio Production Level 2 – Compressors  makes compressor theory understandable, and gives many practical aural examples and comparisons (Compressor On, compared with Compressor Off) as well as useful visuals. All the identical audio and plugins used in this course are available for you to download, making the examples very straightforward to follow.

Instead of just giving specific ‘general’ settings for compressing different instruments and sounds, this course provides you with the knowledge so that you can work out your own settings for any given situation. It gives a solid grounding in understanding why you are doing what you are doing, moving forward to a new level in the use of compression. 

The Sections:

Ratio – What it is, Ratio range, Gain Reduction and dynamic range. What ratio to use, and how much gain reduction to apply and why. working out the dynamic range. Opening and setting up the Compressor

Attack & Release – Setting up Attack and Release, how the attack and release controls affect the audio, setting the threshold, adjusting the makeup gain, the reason why the longest release settings are not useful, different results with different compressors.

Side Chain – How to set up side chain compression and how it works, accessing the side chain of the compressor, setting the threshold effectively, adjusting the release, looking at block diagrams to understand the route the audio takes, adding an EQ to change what the side chain hears, how to engage the preview filter, how to create a band pass filter using the high pass and low pass controls and what it’s doing

RMS Compression v Peak Compression – What the Peak Compressor deals with, what it does and what it’s good for controlling, what RMS means, what it does and what it’s good for controlling, looking at the time reference, looking at the Master VU Settings metering for Peak compression and RMS compression, and an explanation of the window size.

Parallel Compression – A demonstration of parallel compression in action Looking at three methods for applying parallel compression. Looking at the parallel compressor settings, two points about parallel compression to be aware of, a demonstration on where parallel compression doesn’t work, whether to use Peak or RMS compressors for Parallel Compression, the four main controls on the compressor and their use within Parallel Compression. Parallel compression in the context of a full mix

Mixbus Compression – The two accepted and different ways to set up your Mixbus Compression. Looking at density in a track. Looking at punch, looking at the peak value, looking at the wav files, looking at the output peak and rms meters, looking at the TAN compressor’s individual controls, four pointers to set up the Master bus compressor.

Transient Processer & Dynamic EQ – The different names Transient Processers go by, what they are particularly suited to, how they work, what they do, the names of the two parts that the processer divides the audio into, the volume controls, a demonstration with a transient processer. Looking at Dynamic EQ, what it is, how it compresses compared with a normal compressor, the different names for normal compressors, a comparison between a broadband compressor and a dynamic EQ,

Have a look at some reviews about Audio Production Level 2 – Compressors

* * * * *  This is a great course! I now understand a  lot about compressors that I had no clue about before.  Can’t wait for the next course.

BJ 2021

* * * * *  This course is to the point with well thought out explanations.  Very well presented.
Adrian 2021

* * * * *  I really enjoyed this course.  It was very informative but clearly explained and demonstrated.  There’s a lot to take in but it is manageable, with the sections and diagrams when needed.  I would definitely recommend both Level 1 & 2 of Liam’s Sound Engineering Courses.  Thank you!

Stephanie 2020

* * * * *  Good course. Well presented. No nonsense, just the practical facts.
Kevin 2020


* * * * * 
Just buy it, you won’t regret it.
Mecit  2020

1
Introduction

An in-depth overview of what you will learn in every video and on every section of this course, and what you will be able to do by the end of each section.
Also some useful and practical advice on how to get the most out of the course.

2
Course Information

Useful information to help ease your way through this course, what you will already need to know to be able to get the most from it and some of the many compression questions that this course will help you understand and resolve for you

3
Reaper Software Update 2022

For those of you who have not done my Level 1 course, this lecture explains the differences between theme 3.0m (which I use to teach my courses on) and the current theme 6, currently available. I felt it important to include as there are some fundamental differences Reaper has made to the appearance, which some might find confusing. If you wish to download the same theme as I use, I have included it, along with instructions on how to download, in a zip file in the Resources for this lecture.

Ratio

1
Ratio 1

Ratio range, Gain Reduction and dynamic range, and an overview on what you will learn in this particular section

2
Ratio 2

Where to start to work out what ratio to use, and how much gain reduction to apply. A demonstration with a one-bar drum loop (drum loop files provided as a download), listening to the loop, working out the dynamic range, using the track meter, the drums used in the drum loop, enlarging the image, looping a snare and noting its peak value, then looping a kik drum and snare noting their peak values, working out the dynamic range, and working out what does and does not need to be turned down. Opening and setting up the Compresser, setting Attack and Release, setting the Ratio to 2:1 and setting the threshold, the gain reduction meter, adjusting the threshold to affect the snare only. Adjusting the output to compensate, listening to the difference with the compresser on and off. Adjusting the Ratio to 4:1 and then to 6:1 for comparison, adjusting the output to compensate and listening to the difference


3
Ratio 3

Continuing in the context of a full mix (multi-track files provided as a download – all marked MT for this multi-track), a breakdown of the different instruments in the multi-track, focussing on a section of the multi-track, where to start on a mix, a basic balance, a listen to the section being used, looking at the vocal wav file and using a compresser to be able to hear all the vocals, setting up the compresser ratio to 2:1, setting up the threshold to affect the loudest vocals only, noting the gain reduction and increasing the output volume accordingly, listening back with the compresser on and off to compare the difference, and doing the same again at a ratio of 4:1

Attack and Release

1
Attack and Release 1

A short overview on what you will learn in this section, plus a look at milliseconds and microseconds

2
Attack and Release 2

How the attack and release controls affect the audio using a snare drum, the three distinct stages that the snare hit goes through, tuning in to each sound stages of the drum hit, opening up the compresser, setting it up, setting the threshold, adjusting the makeup gain, moving the attack time making it shorter whilst in playback to hear how it affects the sound of the snare, comparing the difference betweeen the two settings, moving the attack time making it longer whilst in playback to hear how it affects the sound of the snare, shortening the the release time and comparing with the original sound of the snare, lengthening the release time and comparing with the original sound, looking at the gain reduction meter, the reason why the longest release settings are not useful, different results with different compressers

3
Attack and Release 3

How the attack and release controls affect the audio using a pitched intstrument, a guitar, opening the compresser, setting the attack and release times, setting a high ratio and why, setting the threshold and turning up the output gain, moving the attack time making it shorter whilst in playback to hear how it affects the sound of the guitar, comparing the difference betweeen the two settings, moving the attack time making it longer whilst in playback to hear how it affects the sound of the guitar, shortening the the release time and comparing with the original sound of the guitar, lengthening the release time and comparing with the original sound, how the differences are a matter of taste and what is best for the particular song, rather than right or wrong

Side Chain

1
Side Chain 1

An overview with block diagrams to explain the theory of how a compresser normally works, what is happening inside the compresser, what the side chain is doing, and how it works

2
Side Chain 2

How to set up side chain compression and how it works, an example where you'd use side chain compression, the io button, how to use extra track channels to access the side chain, a demonstration of the audio used to demonstrate this Lecture prior to any compression, why we're using the kik and bass to demonstrate side chain compression, setting up the compression for the bass, accessing the side chain of the compressor, setting up a send via the io button on the kik track, to the bass track, setting the volume, setting up the correct track channels so that the kik is being sent to the bass track via the side chain, setting the threshold effectively, a demonstration of pumping, adjusting the release, how the side chain compression makes room for both the bass and kik

3
Side Chain 3

Side Chain filters and EQ, listening to the audio before processing, looking at block diagrams to understand the route the audio takes, adding an EQ to change what the side chain hears, opening the compresser, the built-in side chain EQ, how to engage the preview filter, how to create a band pass filter using the highpass and lowpass controls and what it's doing, why the preview filter needs turning off, altering the threshold and output gain, engaging the highpass filter and comparing the difference, how to set up a fully parametric EQ in the side chain, using the EQ to affect the drum frequency volumes and clarity

4
Side Chain 4

RMS Compression v Peak Compression

1
RMS Compression v Peak Compression 1

What the Peak Compresser deals with, what it does and what it's good for controlling, what RMS means, what it does and what it's good for controlling, looking at the time reference, looking at the Master VU Settings metering for Peak compression and RMS compression, and an explanation of the window size

2
RMS Compression v Peak Compression 2

Listening to RMS compression and Peak compression on the same audio material and comparing and contrasting, introduction to new plugin (link available in notes), floating the compressers for ease of seeing the difference visually, setting up the RMS and Peak compressers, comparing and contrasting the two, using a compresser where you can alter the size of the time reference, how this affects the attack and release

Parallel Compression

1
Parallel Compression 1

A demonstration of parallel compression in action and the difference it makes to the sound, the different names parallel compression is known by and why, what it is, an example of reverb as a parallel processer, how the parallel compression sounds and what difference it's making

2
Parallel Compression 2

Looking at three methods for applying parallel compression using a drum loop, method 1 and the disadvantage to this method, method 2 using the 'wet' and 'dry' on two different compressers, method 3 using 5 drum tracks, creating a new track and sends, what dictates whether the tracks should be in stereo or mono, setting up sends and explaining whether the send be pre or post fader (and an explanation of what that means), listening to the effect it has, checking volume levels

3
Parallel Compression 3

Looking at the parallel compresser settings, two points about parallel compression to be aware of, a demonstration on where parallel compression doesn't work, whether to use Peak or RMS compressers for Parallel Compression, the four main controls on the compresser and their use within Parallel Compression, testing the amounts of gain reduction with different ratios, listening to the effects from different attack and release, sharing a handy tip

4
Parallel Compression 4

Looking at parallel compression in the context of a full mix, listening to the mix, setting up three separate parallel compression tracks, sending the sends to the buses, setting up a parallel bus track for the three parallel compression tracks

Mixbus Compression

1
Mixbus Compression 1

The different names for Mixbus Compression, the two accepted and different ways to set up your Mixbus Compression and an overview of what to expect in this section of the course

2
Mixbus Compression 2

Looking at density in a track, comparing before and after, looking at the peak value, looking at the wav files, looking at the output peak and rms meters, the reason why the volumes sound different

3
Mixbus Compression 3

Looking at punch, and how to maintain and enhance the punch in a mix, looking at the TAN compresser's individual controls, four pointers to set up the Master bus compresser, setting the compresser up, listening with and without the compression

Transient Processer & Dynamic EQ

1
Transient Processer

Although Transient Processers are not compressers per se, they alter the dynamic range of audio, the different names they go by, what they are particularly suited to, how they work, what they do, the names of the two parts that the processer divides the audio into, the volume controls, a demonstration with a transient processer, listening to the before and after of each control, examples of how to get different drum sounds for different types of music

2
Dynamic EQ

Looking at Dynamic EQ, what it is, how it compresses compared with a normal compresser, the different names for normal compressers, a comparison between a broadband compresser and a dynamic EQ, a demonstration and an explanation of frequency selective compression, an explanation of some of the controls of the Nova Parallel Dynamic Equalizer particularly pertaining to dynamic EQ, how to use a Dynamic EQ and a demonstration of the plug-in on audio

You can view and review the lecture materials indefinitely, like an on-demand channel.
Definitely! If you have an internet connection, courses on Udemy are available on any device at any time. If you don't have an internet connection, some instructors also let their students download course lectures. That's up to the instructor though, so make sure you get on their good side!
4.8
4.8 out of 5
39 Ratings

Detailed Rating

Stars 5
25
Stars 4
13
Stars 3
1
Stars 2
0
Stars 1
0
ea35231f0046c35d1882e9bc83268fed
30-Day Money-Back Guarantee

Includes

4 hours on-demand video
Full lifetime access
Access on mobile and TV
Certificate of Completion

Archive